Modular Suitcase
About
Being a goat skinner, that obviously wasn't enough for me. So I started building a suitcase on my own (with some inspiration from Victor Mazón Gardoqui), trying to adhere to cabin luggage size limitations (40cm x 50cm x 20cm) for most airlines, just to learn that the goat skinner changed their suggestions when I was about to start building. Although being a suggestion, it is most likely that many airlines will stick with this new size limitation (55cm x 35cm x 20cm), which is sad, because with a little over 40cm you can actually fit in 3x 3 U into your suitcase! Nevertheless, I decided to move forward with my initial size limitations for my suitcase. It can host 6 x 19" of modular Eurorack goodness.
Note: My modular suitcase is designed to fit with up to four Befaco Power Busses and one accompanying 2A WEHO D-60 power supply. It can host modules of depth up to 5cm on the upper side and modules of a maximum depth of 7cm on the bottom side. This may or may not be what you are looking for.
License: All information, pictures and other files on this page are CC BY-SA 3.0 licensed.
Yadayada: This is all very nice, but take me to the Pictures!
Planning
I'm not a fluent CAD software user, so I decided to use Inkscape (a powerful, free and easy to use vector graphics tool) for planning the whole thing instead. The below pictures are taken from the created SVG files, which you can find here (right click and "save as"):
Front
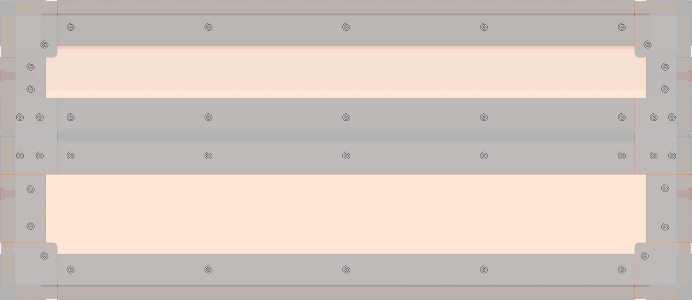
Front view on modular suitcase (outer).
Width |
45,3cm (without handle) |
Height |
19.6cm |
Light brown |
Plywood |
Light gray (semi-transparent) |
Closing profiles, casemaker, corners |
Spirals (black) |
Drill marker (rivets) |
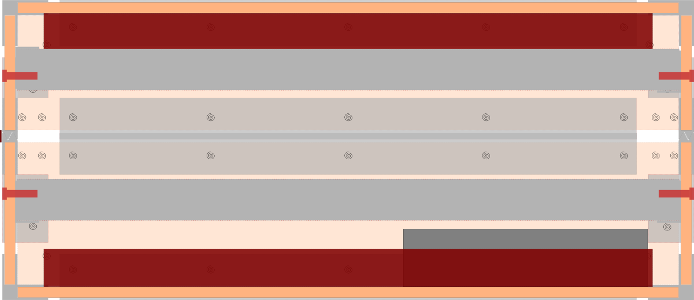
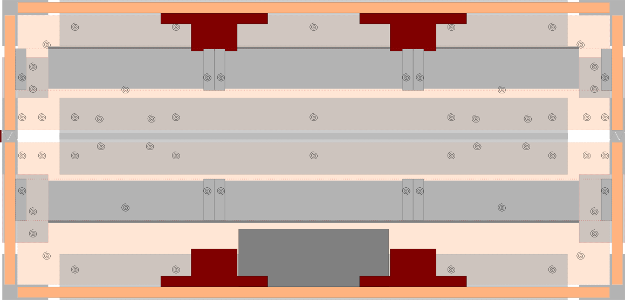
Front view on modular suitcase (inner)
Width |
~ 45cm (without handle) |
Height |
19.6cm |
Light brown |
Plywood |
Light gray (semi-transparent) |
Closing profiles, casemaker, corners |
Spirals (black) |
Drill marker (rivets) |
Red rectangles (semi-transparent) |
Power Busses |
Dark gray rectangle |
Power Supply |
Light gray rectangles |
Rails |
Red screws/bolts |
Rails screws |
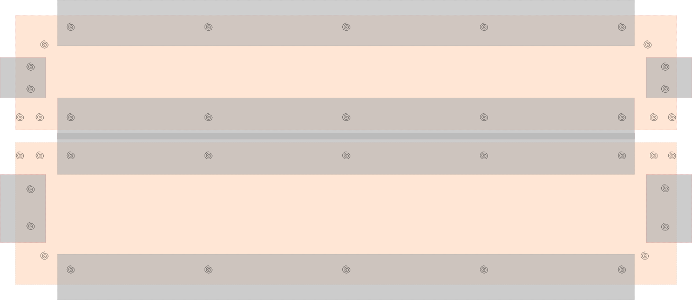
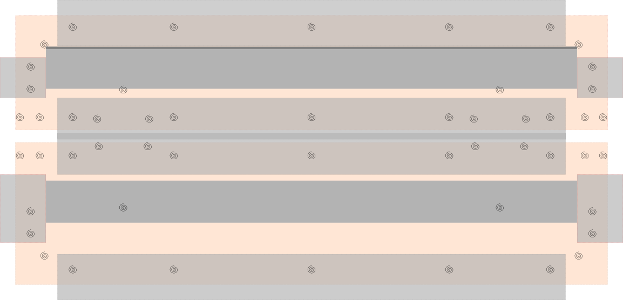
Front view on modular suitcase (background)
Width |
~ 45cm (without handle) |
Height |
19.6cm |
Light brown |
Plywood |
Light gray (semi-transparent) |
Closing profiles, casemaker, corners |
Spirals (black) |
Drill marker (rivets) |
Side
Side view on modular suitcase (outer)
Width |
40.7cm |
Height |
19.6cm |
Light brown |
Plywood |
Light gray (semi-transparent) |
Closing profiles, casemaker, corners |
Dark gray (semi-transparent) |
Handle, Locks |
Spirals (black) |
Drill marker (rivets) |
Spirals (red) |
Drill holes (rails screws) |
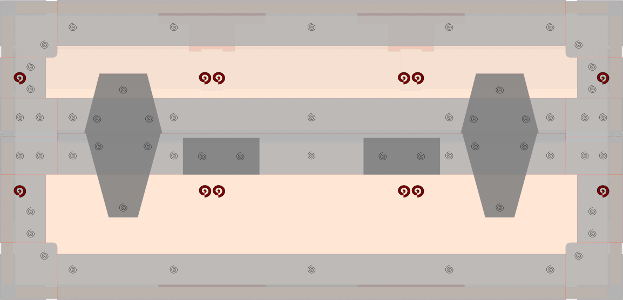
Side view on modular suitcase (inner)
Width |
40.7cm |
Height |
19.6cm |
Light brown |
Plywood |
Light gray (semi-transparent) |
Closing profiles, casemaker, corners |
Spirals (black) |
Drill marker (rivets/ rails screws) |
Red rectangles (semi-transparent) |
Power Busses |
Dark gray rectangle |
Power Supply |
Medium gray rectangles |
Spacer bar |
Light gray rectangles |
Rails |
Side view on modular suitcase (background)
Width |
40.7cm |
Height |
19.6cm |
Light brown |
Plywood |
Light gray (semi-transparent) |
Closing profiles, casemaker, corners |
Medium gray rectangles |
Spacer bar |
Spirals (black) |
Drill marker (rivets/ rails screws) |
Material
Ready mades
Here's a list of things I bought for the suitcase:
Quantity |
Item |
|---|---|
5 |
Adam Hall 6106 (aluminium casemaker) |
5 |
Adam Hall 6202 (aluminium closing profile) |
8 |
Adam Hall 40402 (zink plated steel corner brace) |
8 |
Adam Hall 4000 (zink plated steel corner) |
7 |
Adam Hall Blind Rivet (20 x 4,8mm x 15mm blind rivets) |
4 |
Adam Hall 1602TP (cheney-lock with eye, galvanized) |
1 |
Adam Hall 4911TP (set of four rubber feet) |
1 |
Adam Hall 3415 (handle) |
12 |
19" rail (19" rack rail, without edge) |
Screws, washers and nuts
Plywood
Quantity |
Dimensions |
|---|---|
2 |
43,2cm x 7,5cm |
2 |
43,2cm x 9,3cm |
2 |
38,7cm x 7,5cm |
2 |
38,7cm x 9,3cm |
2 |
43,2cm x 38,7cm |
Building
Tools
You'll definitely need the following tools:
circular saw bench (if the plywood could not be cut properly by the hardware store, or you just want to do that yourself)
- bench drill (choose this over a standard drilling machine for more accurate and straight drill holes)
5mm metal drill head
5mm wood drill head
3mm metal drill head
3mm wood drill head
sandpaper (80 & 120 or 240)
hammer (always good to have one)
metal saw (with thin - preferably a set of exchangeable - saw blades)
cordless screwdriver
GOP (or similar tool, for sawing in strange places)
rivet gun/ riveting tongs
a brush and matte paint (for the finish)
A note on cheap tools, especially cheap riveting tongs: If you buy the cheap stuff, it'll hurt your hands and it will break after a short while. The one I bought lasted around 70 blind rivets and then it gradually started to degrade and not get a grip on the rivet bolts any longer. Save yourself the trouble and find a space with a high pressure rivet gun or get high quality riveting tongs. It's worth it.
Sawing
You'll need the following quantities and lenghts of aluminium casemakers and closing profiles:
Quantity |
Length |
Component |
|---|---|---|
4 |
33,2cm |
Casemaker |
4 |
37,7cm |
|
4 |
2,65cm |
|
4 |
4,45cm |
|
4 |
33,2cm |
Closing Profile |
4 |
37,7cm |
|
1 |
20cm |
L-shaped WEHO D-60 anchor |
Corner casemaker
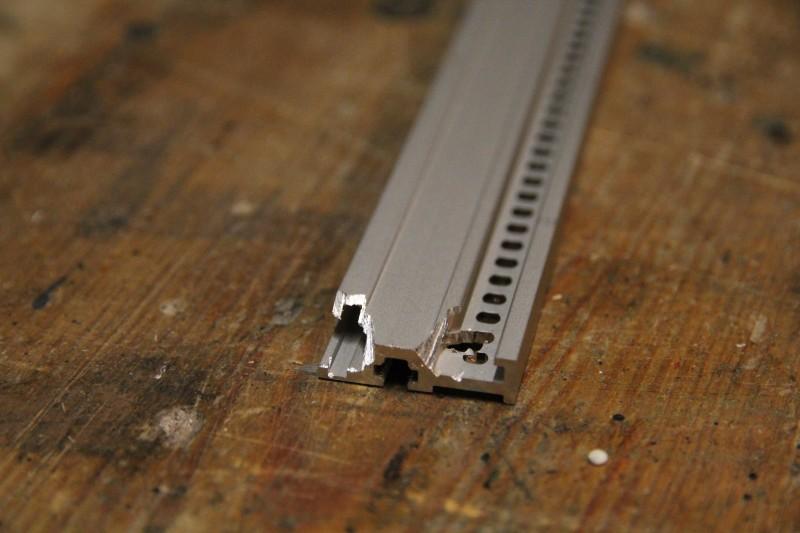
To make the Befaco Power Busses fit into the suitcase, a little opening has to be sawed off. For this you should use a tool like a GOP.
Cavity for the Befaco Power Busses. This has to be around 0,4cm x 7.0cm and starts from around 6,6cm from each side of the 4 shorter (33,2cm) casemakers.
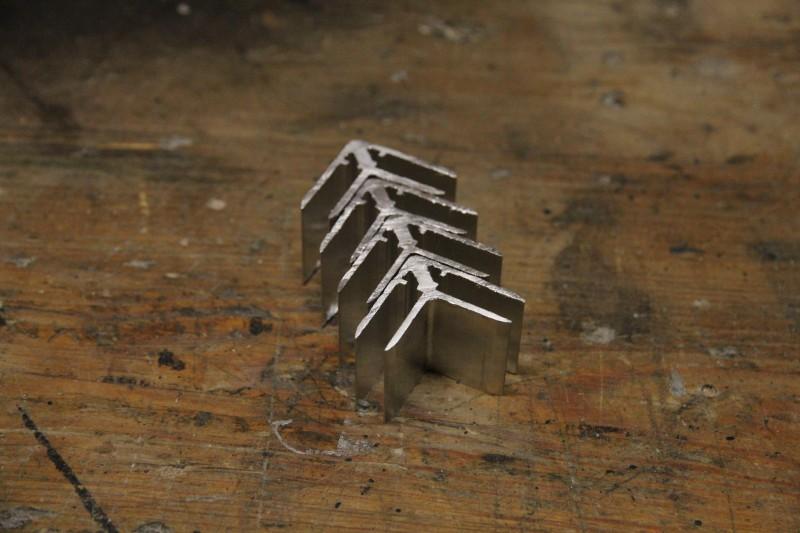
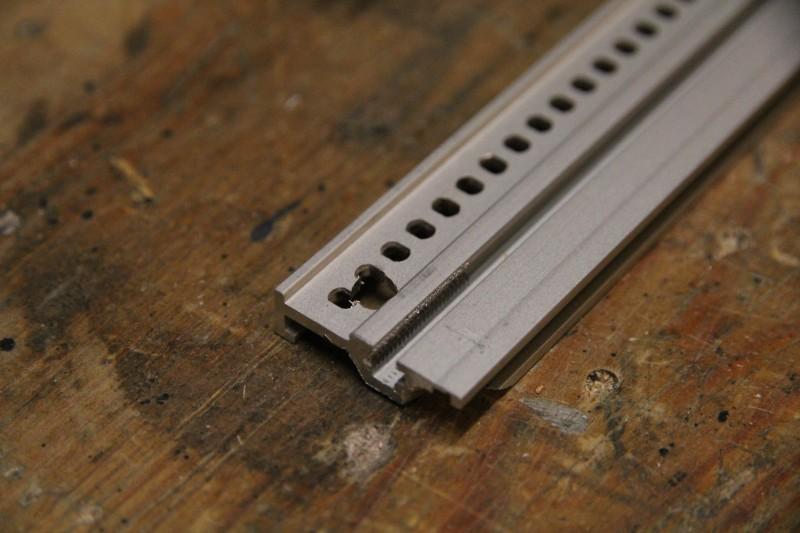
The rails washers for the top part of the modular suitcase have to have a little edge be sawed off. This is needed to be able to properly put a blind rivet for the corner there later on.
Rails washer with sawed of edge (from top part of the suitcase)
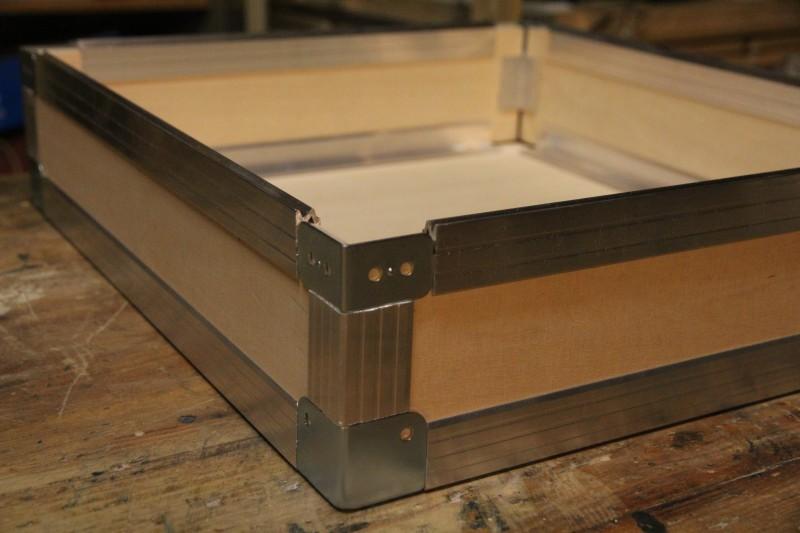
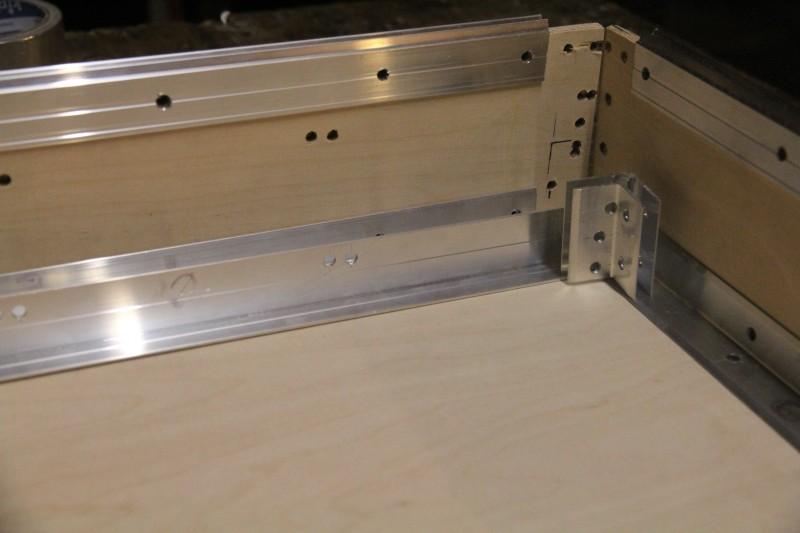
Combination of plywood, closing profile, casemaker and corners before drilling
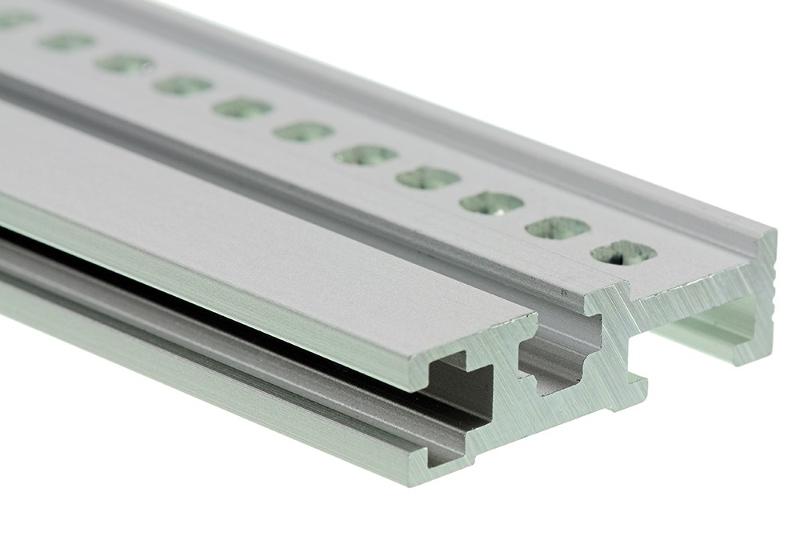
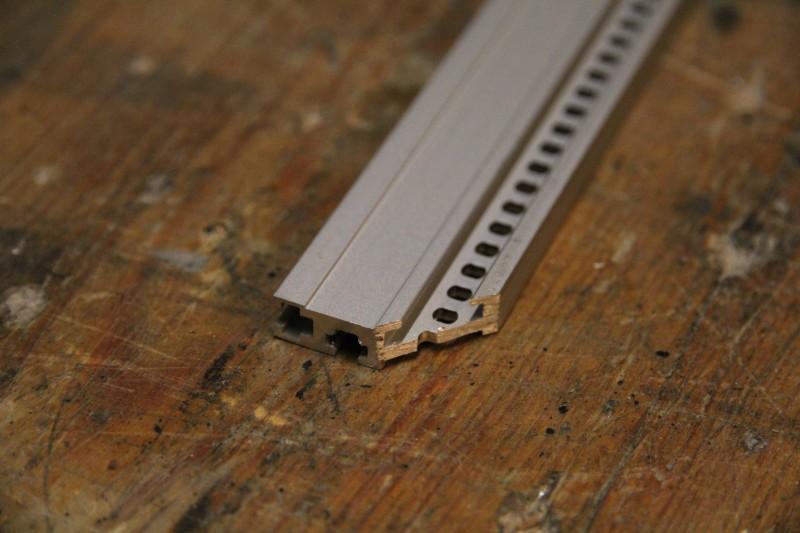
19" rail (without edge), as used in the modular suitcase
Marking
For all non-corner casemakers and all closing profiles their position on the plywood is easily determined (by the length of the corner pieces). They have to have a distance of 2,75cm to each side of the plywood their being put onto.
All casemaker corners must have a distance of 2,7cm to the bottom (of their respective side) of the plywood and a distance of 2,1cm to the top. This applies to both sides of the suitcase.
The rails washers have to be positioned 2cm from each side of the plywood and 4cm and 2,7cm from the bottom of it (for bottom and top of suitcase, respectively).
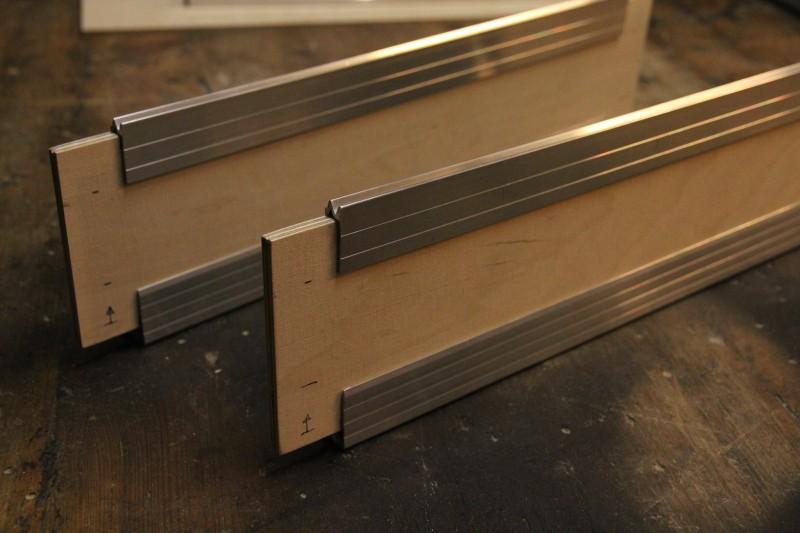
Closing profiles and casemakers on plywood with markings for casemaker corners

Closing profiles and rails washers on plywood with position markers
Component |
Length |
Center of drill holes |
|---|---|---|
Casemaker |
37,7cm |
1cm, 9,9cm, 18,9cm (from both sides and angles)/ each 1,2cm from the opening (for plywood) |
Closing profile |
||
Casemaker |
33,2cm |
1cm, 7,6cm, 16,6cm (from both sides and angles)/ each 1,2cm from the opening (for plywood) |
Closing profile |
||
Closing profile |
33,2cm |
top:
2,6cm/ 1,85cm and 6cm/ 1,85cm (cheney locks)
(from each side/ opening for plywood)
|
|
bottom:
2,7cm/ 1,85cm and 5,9cm/ 1,85cm (cheney locks)
9,45cm/ 1,2cm and 11,9cm/ 1,2cm (handle)
(from each side/ opening for plywood)
|
||
Casemaker (corner) |
2,65cm |
side with rail:
0,6cm/1,2cm, 2cm/1,2cm and 1,35cm/1,7cm (rail), from bottom
|
|
side without rail (from bottom):
0,7cm/1,2cm and 2,1cm/1,2cm, from bottom
|
||
Casemaker (corner) |
4,45cm |
side with rail:
0,6cm/1,2cm, 2cm/1,2cm and 3,35cm/1,7cm (rail), from bottom
|
|
side without rail:
1,0cm/1,2cm and 3,5cm/1,2cm, from bottom
|
||
Corners (bottom) |
- |
1,9cm from each side of bottom plywood corner (applies to every corner on both sides of the suitcase) |
Corners (top) |
- |
0,3cm/ 0,75cm and 1,6cm/ 0,75cm from top plywood corner (applies to every corner on both sides of the suitcase) |
Rails washers |
34,7cm |
top:
10,4cm/ 0,7cm and 11,3cm/ 0,7cm (rails)
5,05cm/ 0cm (cheney locks)
from each side/ top of component
|
|
bottom:
10,4cm/ 0,7cm and 11,3cm/ 0,7cm (rails)
5,05cm/ 1,75cm (cheney locks)
from each side/ top of component
|
||
WEHO D-60 anchor |
20cm |
1,0cm/ 0,9cm from each side and 10,0cm/0,9cm |
Drilling
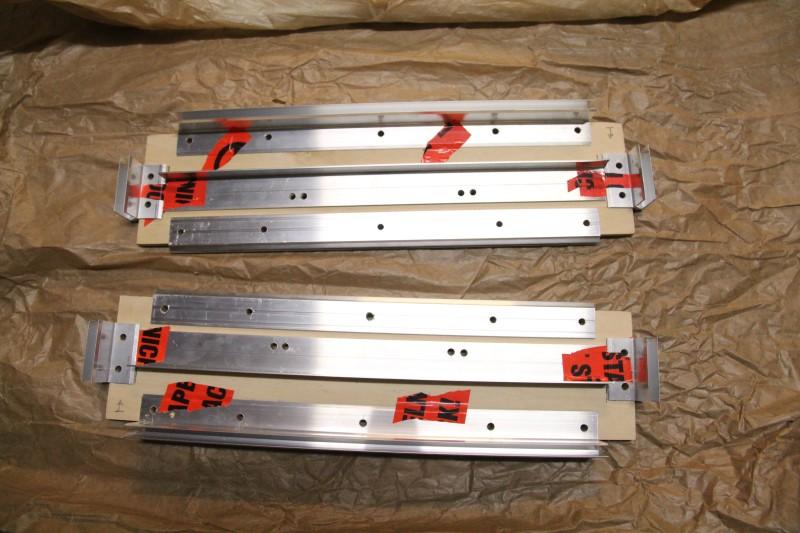
Two pieces of plywood with components taped to it and drilled holes

Piece of plywood with components taped to it and drilled holes
Rails washers, casemakers and closing profiles after drilling. Chances are good, yours will look better (without the drilling fuckups in the corners)
After drilling a disassembly is recommended to clip plywood and aluminium components. This is also the best time for a preliminary test, if all components have the expected dimensions.
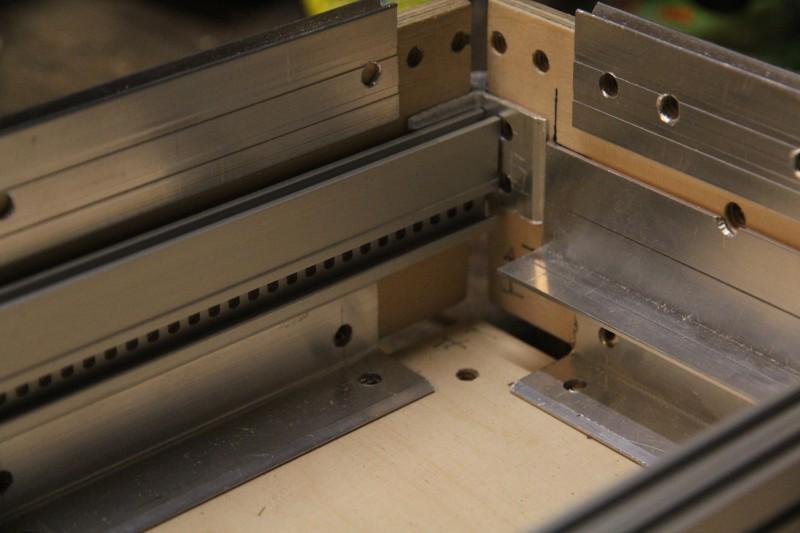
Rails, rails washers, casemakers and closing profiles after drilling.
Rails
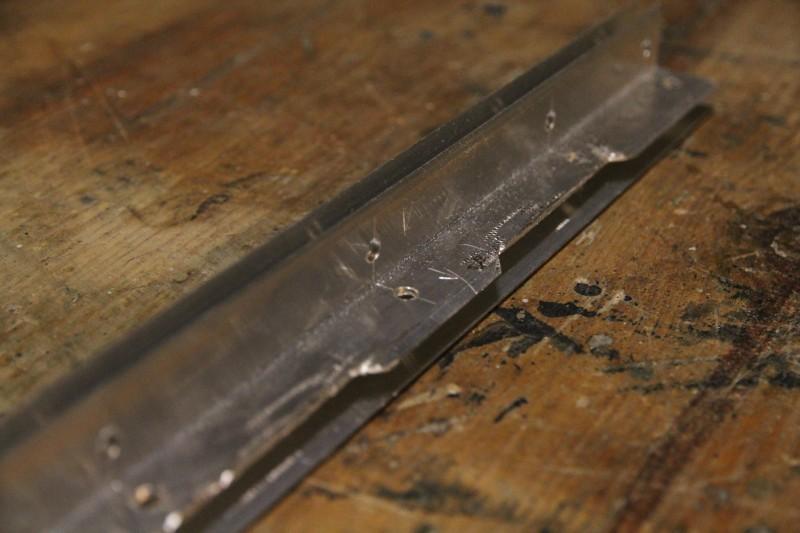
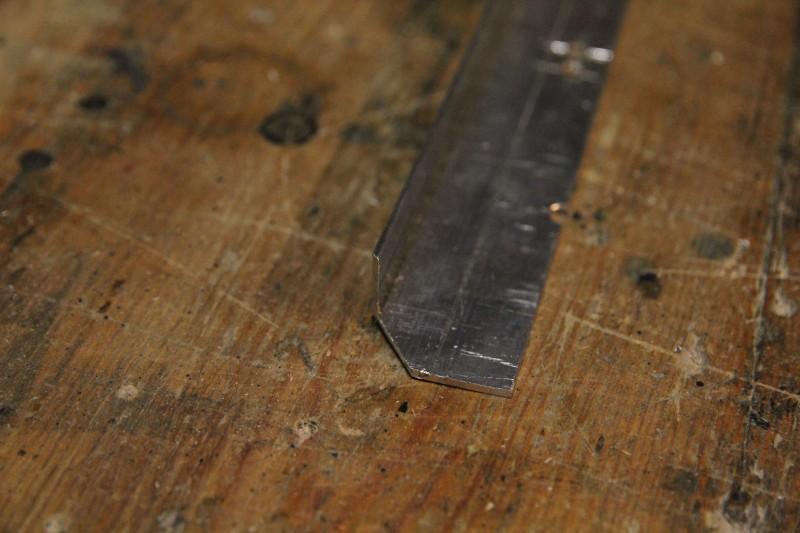
The rails used need some further modifications to be put in the suitcase. One, that has to be applied to the two outer bottom rails is an edge that has to be sawed off.
Outer, bottom rail with sawed off edge (but still with the 1,5mm slice, as mentioned in Sawing)
Another is drilling a hole through the two outer top rails at 0,9cm/ 0,9cm. This ensures, that the the lower of the two blind rivets on the corner pieces of the top part of the modular suitcase can be replaced by one of those M5 screws.
Rail from top side of the modular suitcase with hole drilled through for fixing with screw
A third is sawing off a little edge at the outer top rails, to give the lower blind rivet (parellel to the screw going into the nut rail) enough space.
Rail from top side of the modular suitcase with edges sawn off. Only the right one is correct, the left sawed off edge should be the 1,5mm slice, mentioned in Sawing
Painting
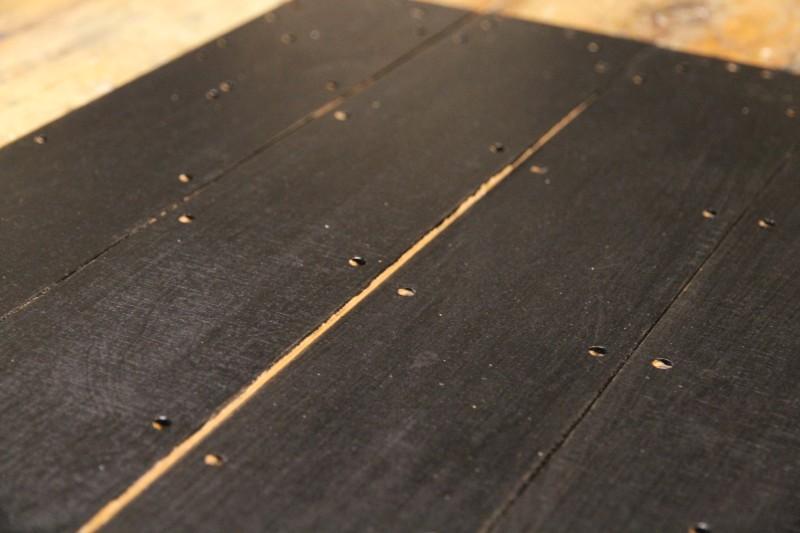
The paint job was quite easy. I applied two rounds of paint.
Plywood after one round of paint.
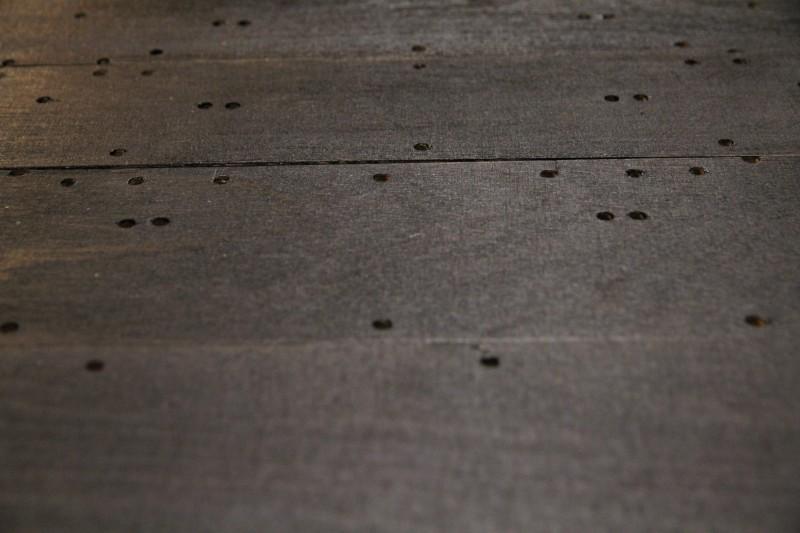
After the first paint job, I used the sandpaper (240) to smoothen the surface and then did a second round. The wood grain is still nicely visible.
Plywood after two rounds of paint.
Assembly
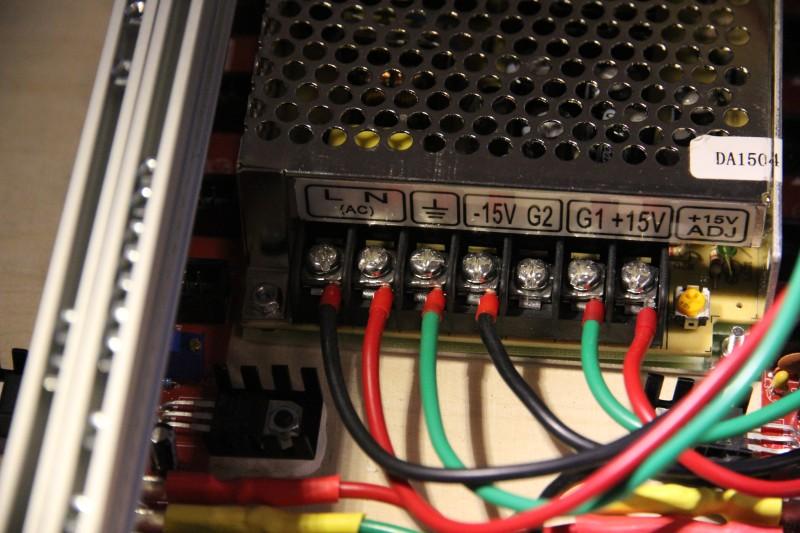
The power supply can be attached to its anchor before all the blind rivets will be put in. For this you have to drill two more holes with the 3mm metal drill head. The drill location depends on the screw locations on the power supply. You will have to open its chassis and put two of the M3 screws there. I used a bunch of nuts to bridge the gap between the power supply and the anchor.
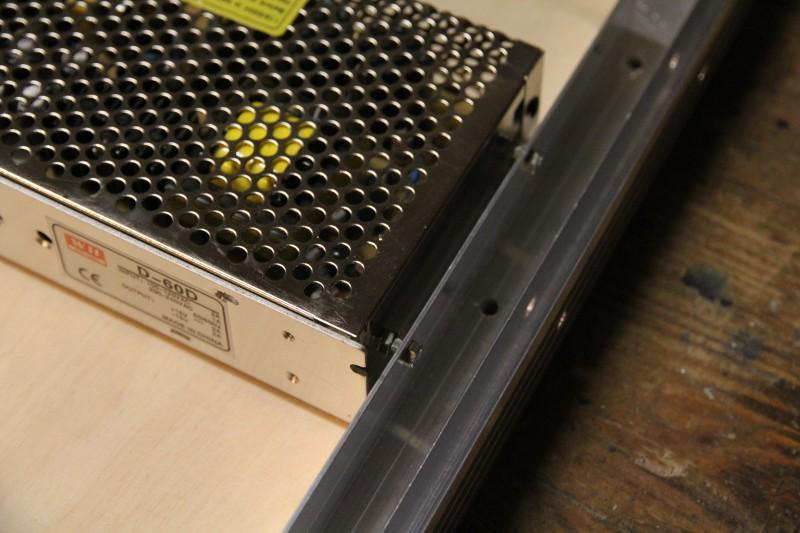
WEHO D-60 power supply showing two M3 screws going through the anchor (side view)
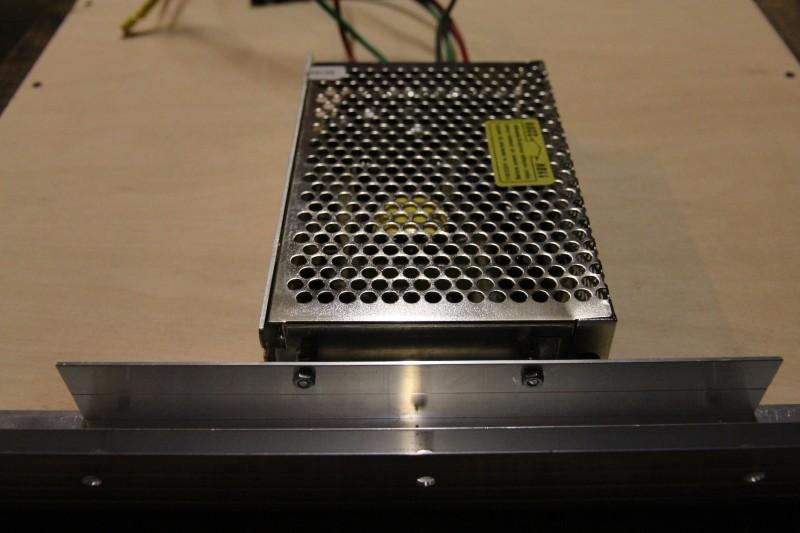
WEHO D-60 power supply showing two M3 screws going through the anchor (frontal view)
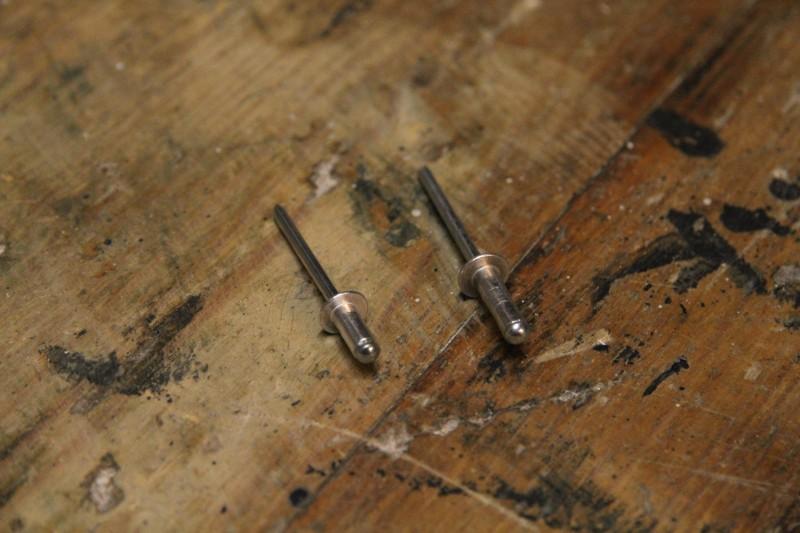
Blind rivets: 4,8mm * 10mm (left) and 4,8mm * 15mm (right). Nearly 140 are needed of the latter.
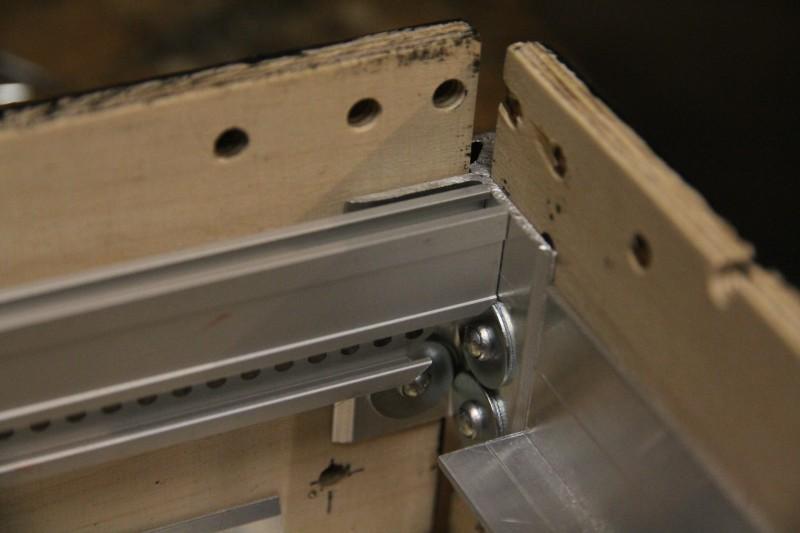
Blind rivets through a corner casemaker with additional washers and a rail with an edge sawed off.
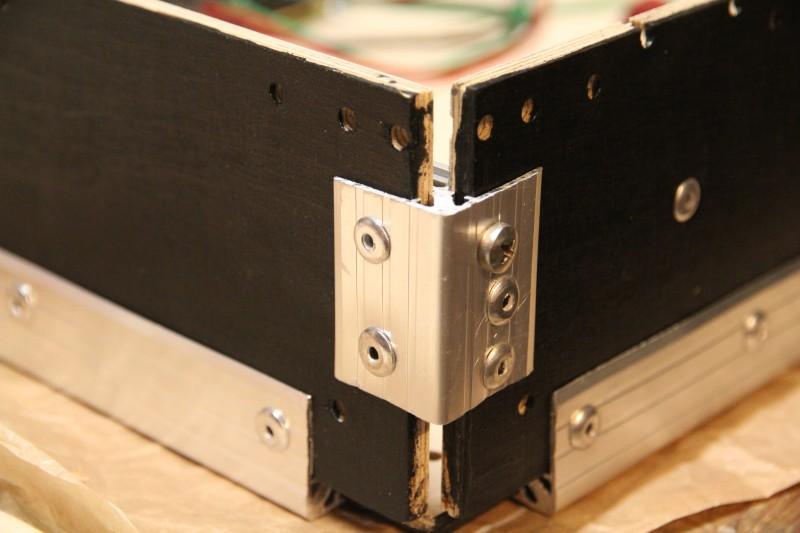
Blind rivets as they should look like on the outside of the suitcase and a screw holding a rail. Without corners.
Bottom half of the modular suitcase with all blind rivets put in.
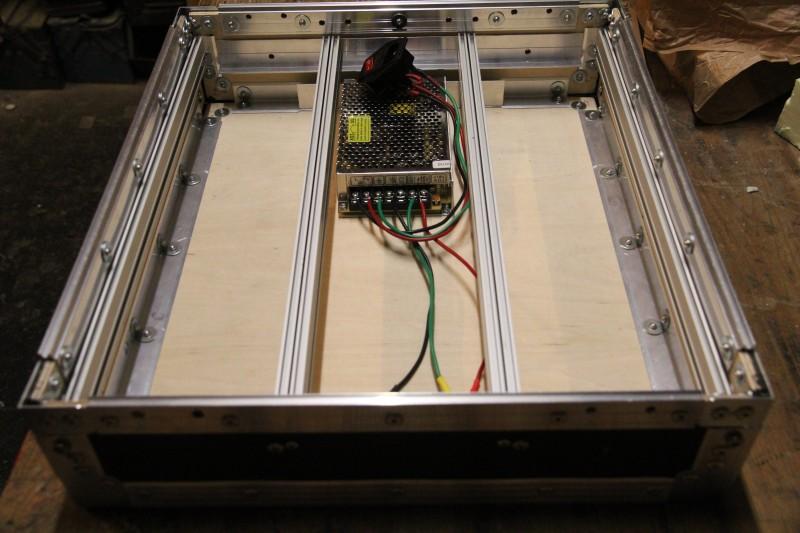
Bottom half of the modular suitcase with screws for the WEHO D-60 power supply
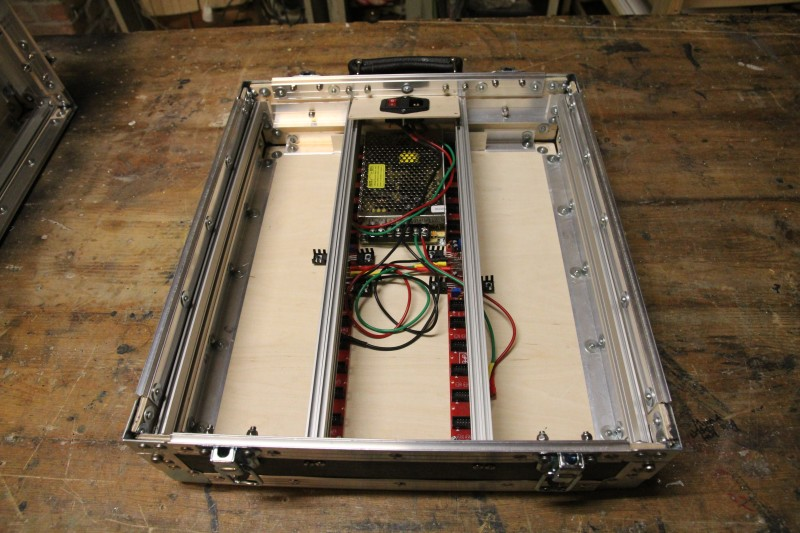
Bottom half of the modular suitcase with the WEHO D-60 power supply and Sugru below the Befaco Power Busses ICs.
Pictures
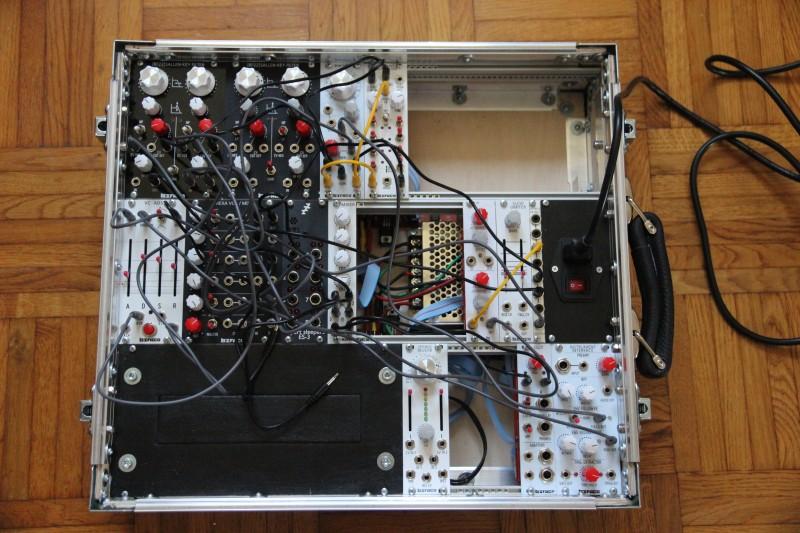
Bottom half of the modular suitcase with some modules.
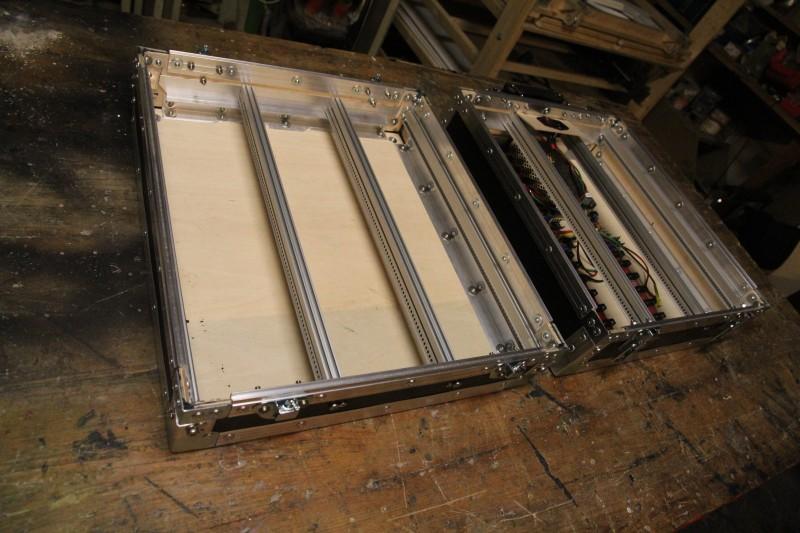
Opened modular suitcase, top half (left) and bottom half (right)
Bottom half of the modular suitcase with attached handle and cheney locks.
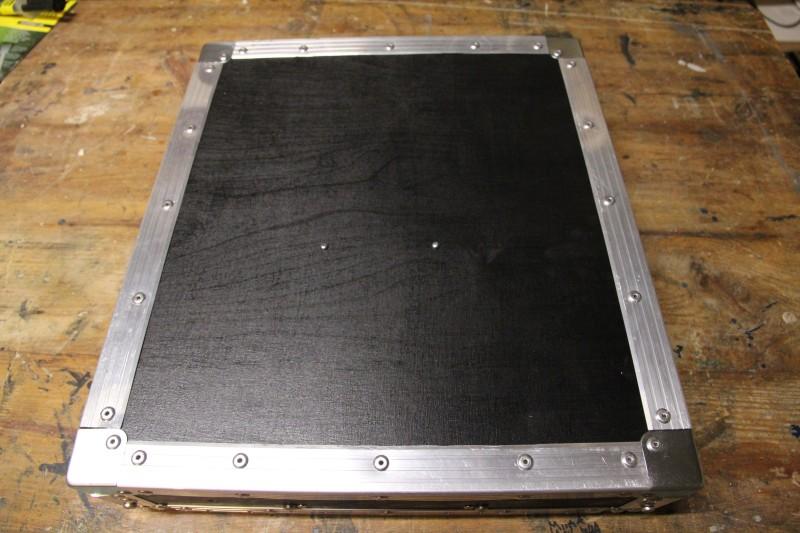
Bottom (right corner) side of (closed) modular suitcase
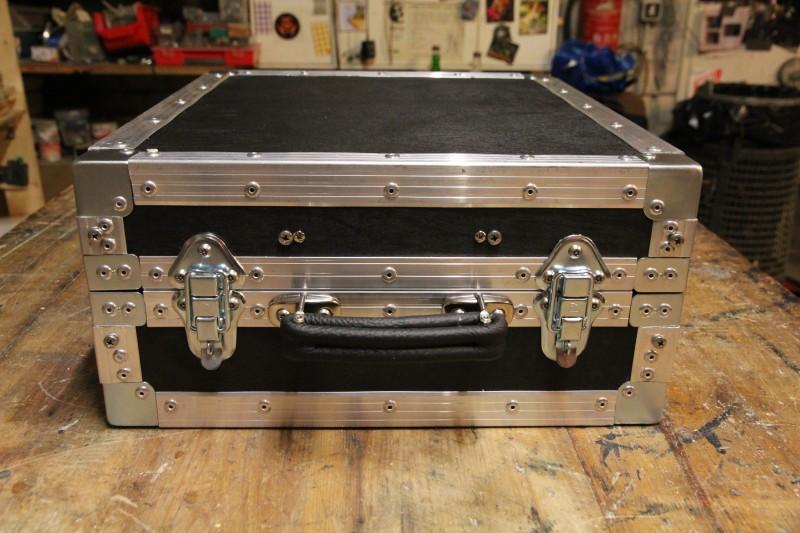
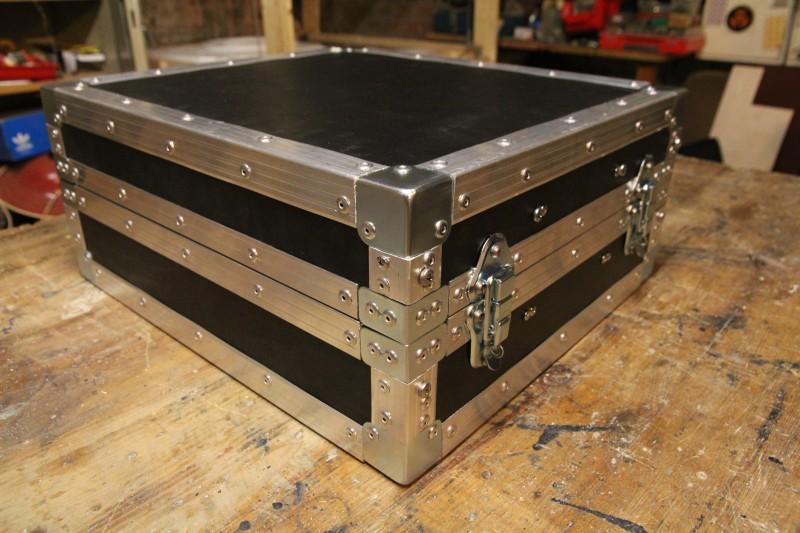
Frontal view on (closed) modular suitcase
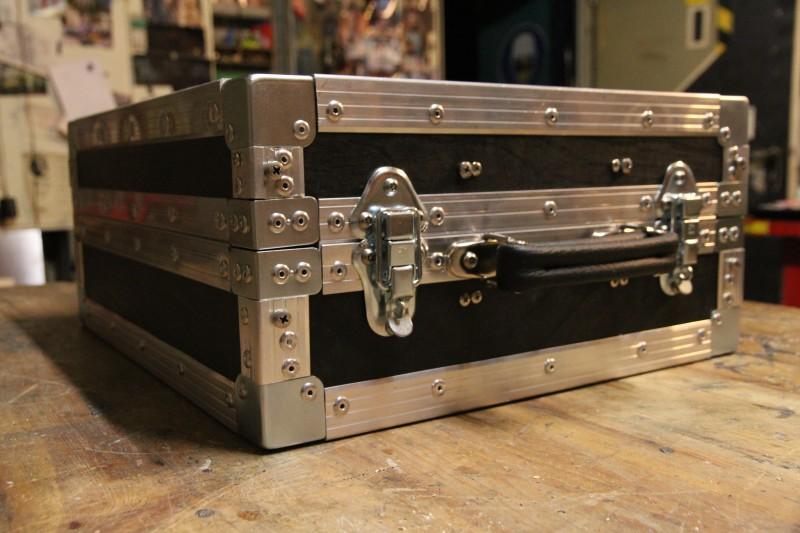
Frontal/ left corner view on (closed) modular suitcase